Getting started
From an empty workspace to a first real answer in five short steps, each ending with something you did not have before. Twenty minutes, with the two example collections to practice on.
DocuDriver keeps your organization's documentation in one place, reads it, builds a dictionary of what it defines, and answers questions from it with the source named every time. The fastest way to see what that means is to do it once with your own files. Every new workspace starts with two small example collections (a set of policies and procedures, and a small sales data project) so you can try each step before uploading anything of your own; the pictures below are from a workspace that has only those.
1. Upload three documents
Open the workspace page (the DocuDriver name in the header takes you there). Under Collections, type a name in the New collection name box, for example the name of a project or a subject, and add it. Then in Upload, choose that collection and drop in three files that belong together: a procedure, a report with the SQL or the query behind it, and a policy. Text, Markdown, Word, PDF, Excel, PowerPoint, SQL, and Power BI files are all read (the full list is in Uploading and collections); text files are read at once and the others within a minute.
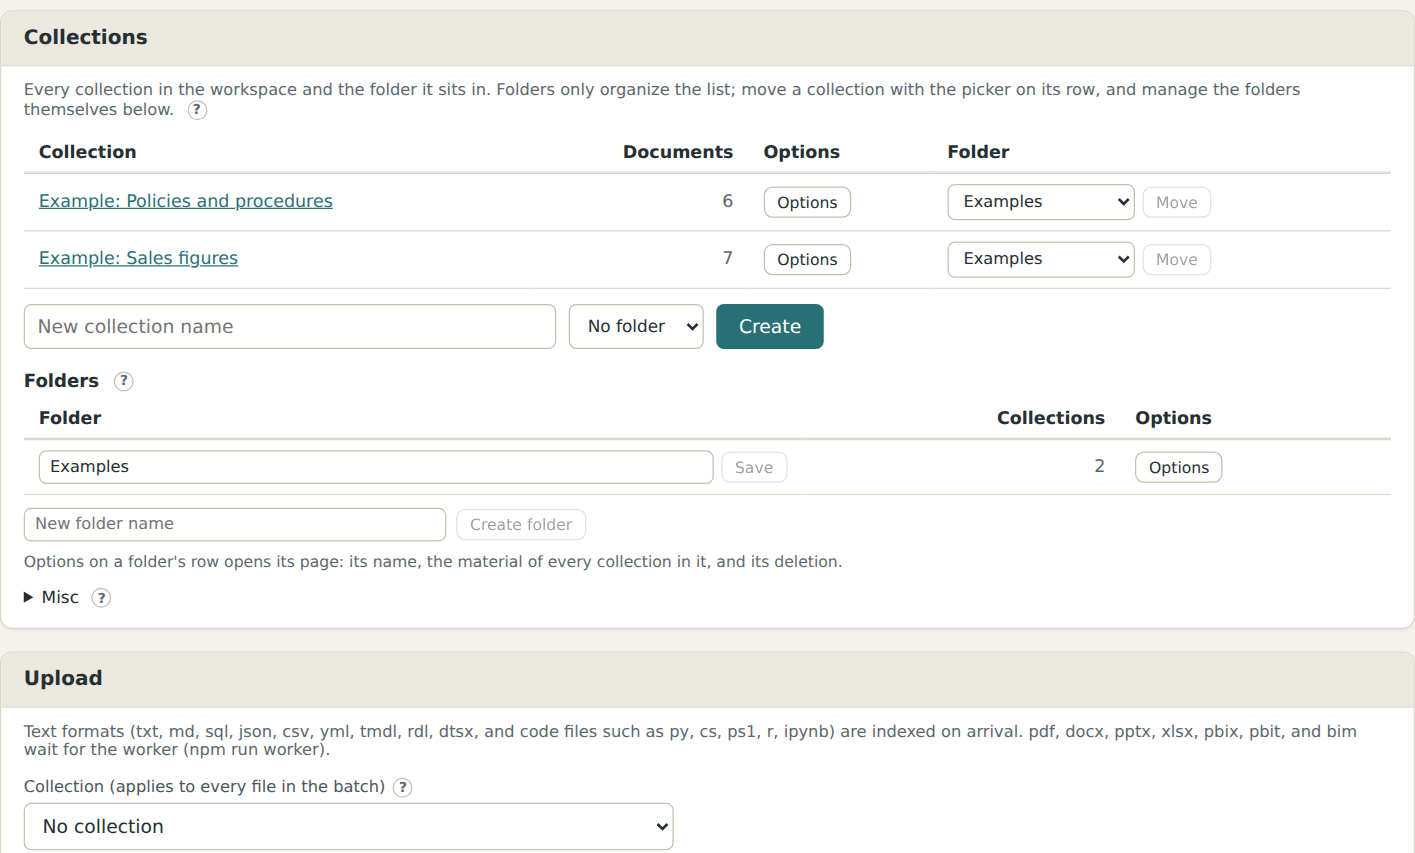
What you now have: three documents in a collection, each read into passages the assistant can search, with the file itself kept and downloadable. Open Sources to see them listed, and select one to see exactly what the assistant reads from it.
2. Read the entries the dictionary made, and correct two
Back on the workspace page, the row of the report or the SQL file now says Edit N entries: as the file was indexed, the product read it for the things it defines (tables, fields, measures, terms, rules) and made an entry for each, already approved and in the collection's dictionary. Open them. Read two: rewrite a definition in your own words where the file's wording is thin, and reject an entry that should not be there. A rejection sticks; nothing you remove comes back on its own.
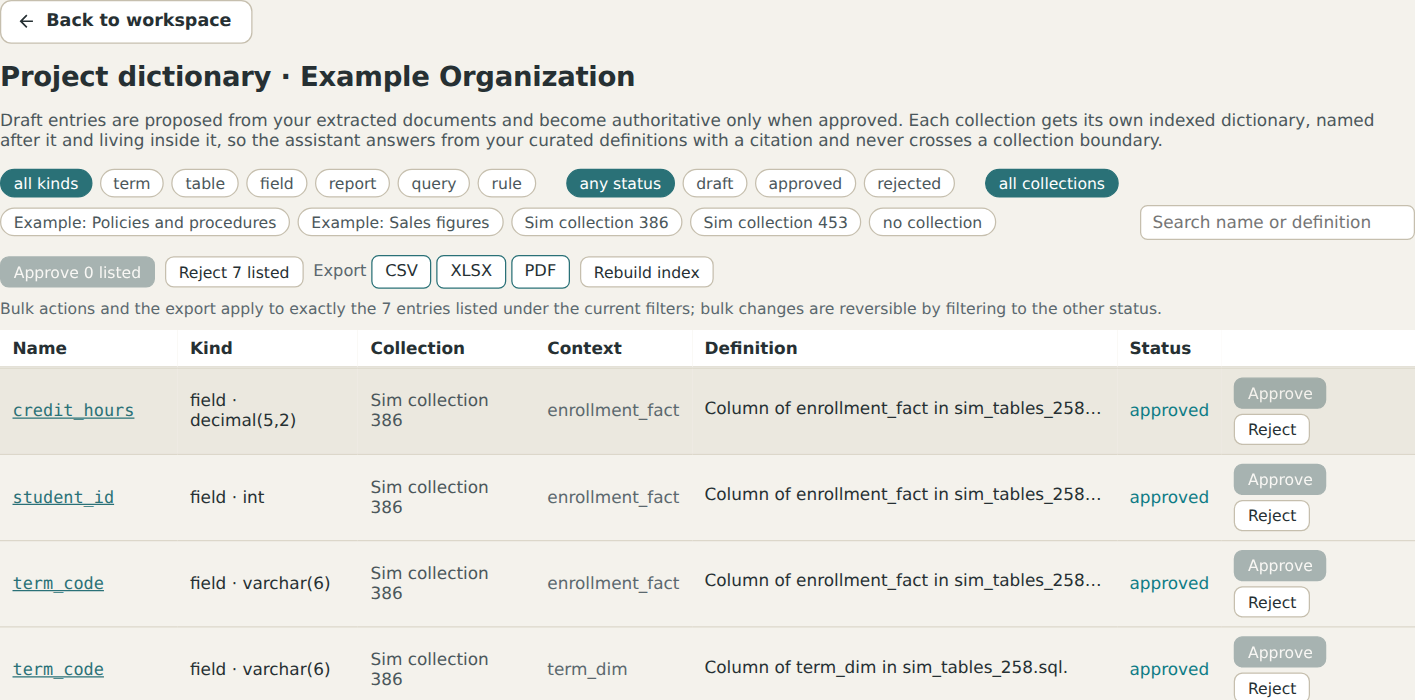
What you now have: a curated definition of two things your documentation uses, in your words, which the assistant prefers over any passage when a question names them. The dictionary is the part of the product that compounds: every approved entry makes the next answer more exact.
3. Ask two questions
Open Ask the assistant. Ask one question the documents answer (for the example collections, try "What is the return period?"). The answer comes with numbered footnotes; each one opens the source at the passage it came from. Then ask one they do not answer. The assistant says so plainly, and if it answers from general knowledge it marks the answer as not from your documentation.
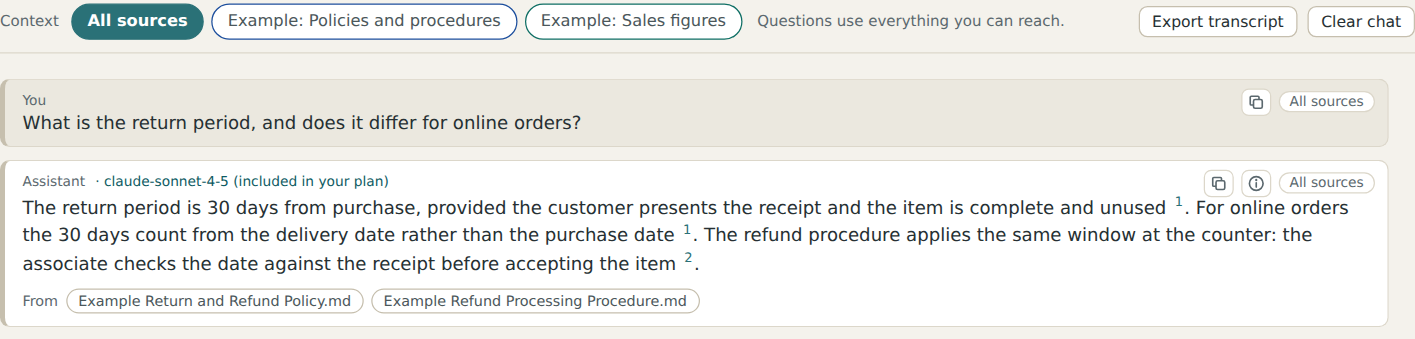
What you now have: proof, for yourself, of the two promises that matter. An answer is always traceable to a file, and the assistant never dresses up a guess as a fact from your documents.
4. Open a footnote
Click a footnote number in the answer. The source opens at that passage, with the passages around it, in a new tab; the conversation stays where it was. A table name or a dictionary entry named in an answer is a link too, to its entry.
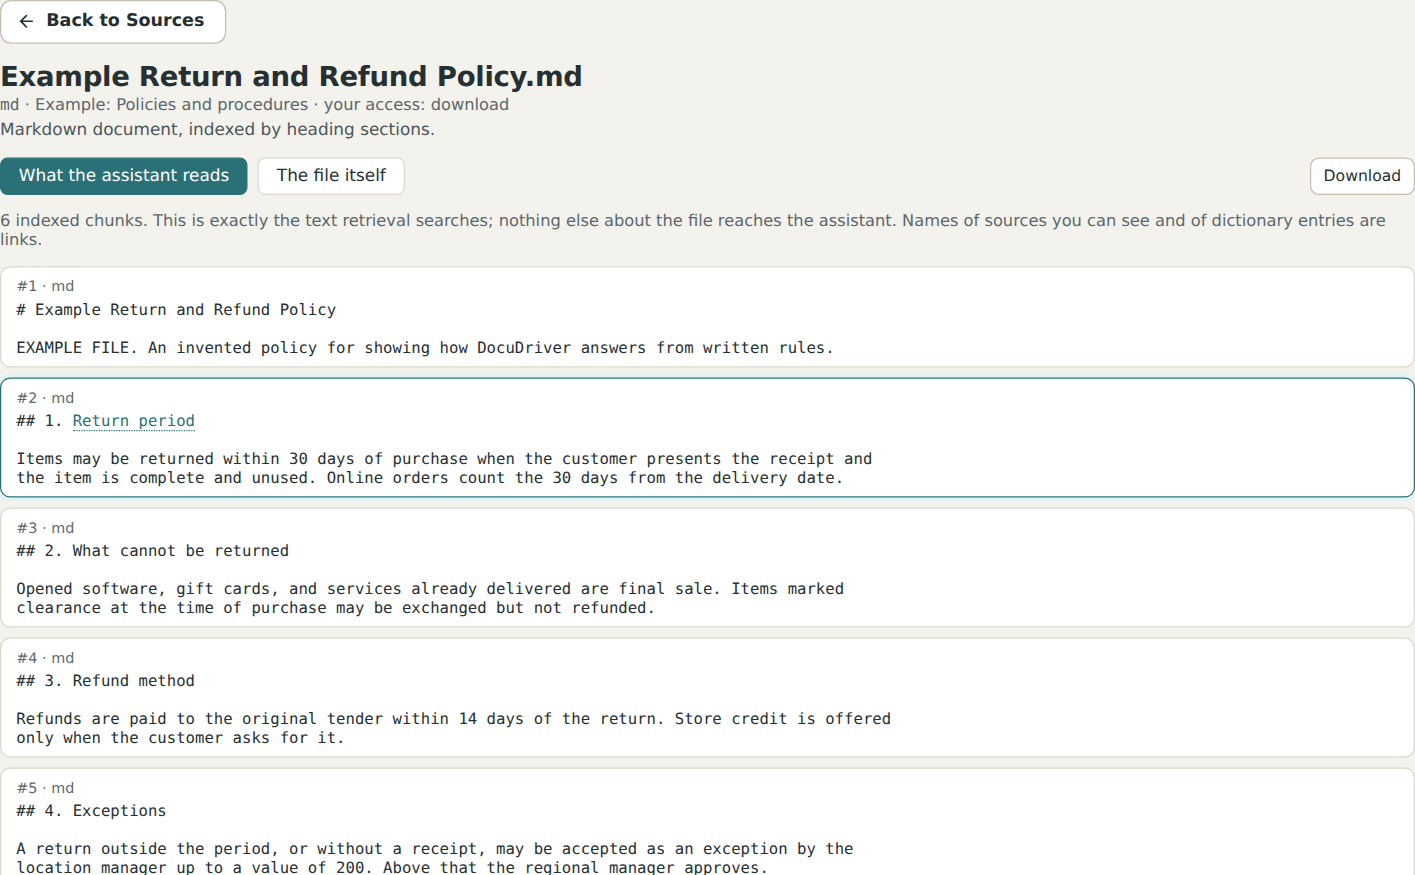
What you now have: the habit the whole product is built around. Read the answer, then check the source in one click.
5. Invite one colleague
Open Members and add one person by email, with the role viewer to start. They receive a mail with a link to choose their password. By default a viewer reaches what you grant: open a collection, and under Access give viewers Ask on it. Then ask them to try step 3.
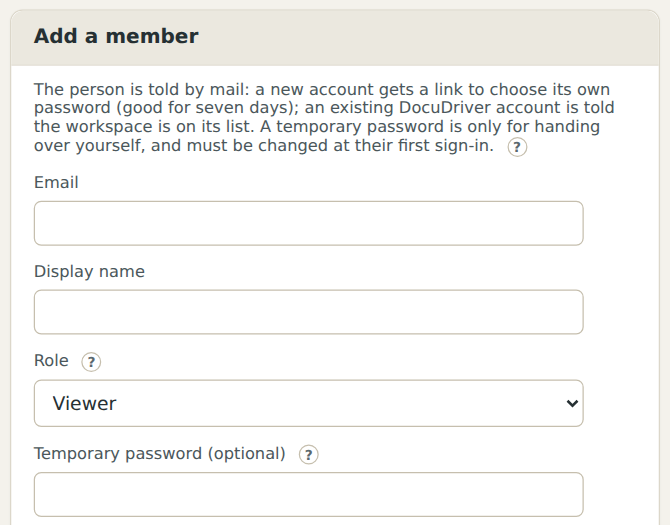
What you now have: a second person who can ask the same questions and get the same cited answers, without seeing anything you did not grant.
Where to go next
- The example collections can be deleted from the workspace page when you have material of your own; the Misc section at the foot of Collections brings them back.
- Audit log records every change you just made, by whom and when; it is the page an auditor asks for.
- Retention sets how long documents are kept, flags stale ones for review, and freezes anything under a legal hold. Nothing is ever deleted automatically.
- Workspace settings names the workspace, sets its look, the help desk your members see, security rules, and the optional own model key.
- The rest of the guides take each of these in turn, in the order a new workspace meets them.